You are using an out of date browser. It may not display this or other websites correctly.
You should upgrade or use an alternative browser.
You should upgrade or use an alternative browser.
IMCO Uni Mount Steering Install - 292 FasTech
- Thread starter SabrToothSqrl
- Start date
SabrToothSqrl
Well-known member
Step 1: Drive Paint Fixes
So, before I go bolting up new stuff, I need to make sure everything else is up to snuff.
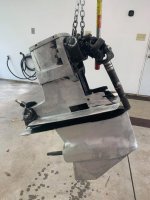
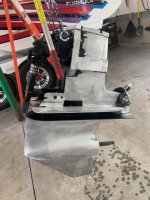
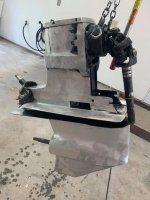
Last winter (in a hurry and all sorts of stupid) I used a 60 grit flap disk to remove paint from my out-drive and that was... a mistake that left it rough and made the paint look flat. It was only cosmetic, but I wanted to fix it. (I was ticked off because I just did a ton of work and went to clear coat the paint, and it wrinkled, and I was not happy.) (Learning is fun!)
I got a 3M paint removal wheel and 2 days of cordless drills, and many, many batteries later, it's much smoother now. I'm going to see if I can sand it with some 120, 220, etc to see if I can smooth this even more.
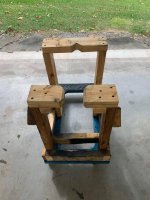
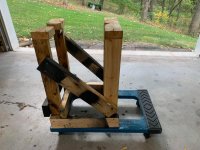
I also rebuilt my drive dolly as when I measured to build it, my boat was bow in the air on a jack and the dolly was not high enough for when the boat was level. So after dealing with that hassle for a while, it's now a better height and a few other small improvements. I'd like to find some outdoor carpet to cover it as well before I put the drive back on the dolly after painting it.
Measurement between my drives is 34.5" measured at multiple points. The tie bar is also set at 34.5" There is a light on the stern inside that's dead center that would be drilled through for the center mount, so I need to remove that, looks like the other person who did this just moved the inside light a few inches port.
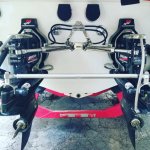
anyway, here are some pics.


SabrToothSqrl
Well-known member
Out with the old
Did some stuff.
Helm to wheel is 6" and 15 degree base.
Going to skip the tilt wheel in favor of the less expensive 15 degree imco one.
Drives are 34.5" apart.
Called IMCO, they are working on pricing. Found out my buddy's race boat also uses IMCO for steering.
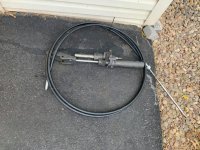
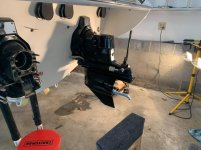
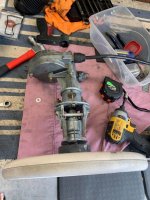
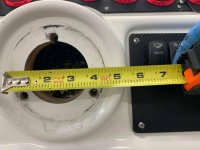
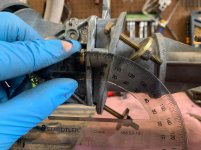
Painting Port drive next, and I think I now have all the measurements needed to order parts. Just need to say a little prayer to the credit card gods, then order some parts!
As my friend said when I texted him a pic... no turning back now!
Ohh, I found this, which I think will be great to make sure my holes are at a 90 to the transom:
https://www.lowes.com/pd/Milescraft-Template/1001470700
Did some stuff.
Helm to wheel is 6" and 15 degree base.
Going to skip the tilt wheel in favor of the less expensive 15 degree imco one.
Drives are 34.5" apart.
Called IMCO, they are working on pricing. Found out my buddy's race boat also uses IMCO for steering.


Painting Port drive next, and I think I now have all the measurements needed to order parts. Just need to say a little prayer to the credit card gods, then order some parts!
As my friend said when I texted him a pic... no turning back now!
Ohh, I found this, which I think will be great to make sure my holes are at a 90 to the transom:
https://www.lowes.com/pd/Milescraft-Template/1001470700
Last edited:
SabrToothSqrl
Well-known member
Parts ordered. All IMCO. They stated I 'shouldn't need' a remote reservoir - my factory one should hold enough fluid. (can always add later)
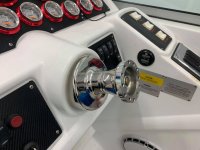
I went with a 15 degree fixed helm of 5". I plan to reused my existing wheel for now since it should bolt up, and is easy to change later.
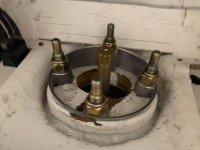
The new helm uses 4 bolts vs. the 3 bolt I had - Should I use anything to fill the old holes to make it stronger? Is there some way to put epoxy or something in them?
Last edited:
SabrToothSqrl
Well-known member
Neat. Never heard of this. But I'm thinking I'd like to fill the holes just for peace of mind.
Yes - there is wood behind it, and I didn't measure but it's fairly thick.
I'll clean it up and get another pic.
So, it's like JBWeld but for fiberglass vs. metal.
West Marine has 2oz for $30, but internet sells it for half that, even with shipping...
I'm going to assume I'm going to need some 4200 or 5200 for the install? At least 8 bolts and 2 hoses will have to pass through the transom. Some red zip ties to match the boat red for running the hoses.
Hopefully Imco/Hardin ships soon! I got 5% back ($1500 cap) via PayPal and Capital One, so hey $75 is $75 right?
SabrToothSqrl
Well-known member
Parts List
Parts Breakdown:
Hose Kit - https://www.hardin-marine.com/p-101078-hose-kit-2-sr-8-1-13-rams-1-pump-1-helm.aspx
Helm Post - 15 degree 5" was closest to my factory, without the cost of a true adjustable.
https://www.hardin-marine.com/p-101...00-dashboard-to-hub-face-polished-316-ss.aspx
Power Steering Fluid Filter
https://www.hardin-marine.com/p-101133-oil-filter-14-mm-fm-o-ring-in-6-jic-out.aspx
Starboard Drive Cap
https://www.hardin-marine.com/p-100...vo-2-ear-lh-1625-offset-clevis-pin-black.aspx
Port Drive Cap
https://www.hardin-marine.com/p-100...vo-2-ear-rh-1625-offset-clevis-pin-black.aspx
External hoses (x4)
https://www.hardin-marine.com/p-101096-hose-assembly-6-jic-x-18000-hose-length-20-end-to-end.aspx
Transom Uni Mount (I think it looks clean and should make install easier)
https://www.hardin-marine.com/p-101...r-34500-drive-centers-polished-316304-ss.aspx
Steering Rams (x2)
https://www.hardin-marine.com/p-101...25-closed-25375-open-clevis-to-clevis-cl.aspx
Internal 90 for inside transom (x2)
https://www.hardin-marine.com/p-101051-adapter-6-jic-swivel-90-316-ss.aspx
$4200 + shipping/tax.
With my super loose steering, replacing the helm, steering cable, rear actuator, was around $2300 I think when I looked at everything...
When I removed the actuator, it seems to want to self extend. i thought that was odd since it's completely disconnected. It shouldn't move on it's own! I wonder if this is what was causing my boat to slowly wander left while at cruise.
Last edited:
SabrToothSqrl
Well-known member
Managed to get some paint runs on my port drive as it was cold and damp when I tried to paint it. so sanding that smooth and repainting will take another 2-3 days. Ugh. I HATE PAINT. Why can't the drives be stainless?!
SabrToothSqrl
Well-known member
Progress
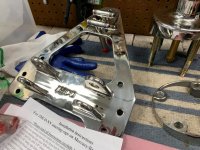
Got some parts late last night. Instructions are crap. Measurements for drilling are just plain stupid. All the sizes are like 1/32" off a 'normal size.
19/32" for a bolt hole... yeah.. ok, normal size is 5/8ths thanks for making it 'fun'.
Have to make a call to IMCO with a question about the nuts that hold the bracket to the helm, looks like you can only attach 3, not 4. the helm control is in the way!
i made a hose end. it wasn't that bad. I haven't cut any yet, trying to figure out lengths without actually running the hoses, then taking them out of the boat just to cut them, install end, and put back in, but not sure I can avoid it.
used JB MarineWeld on the helm holes. I was thinking the other stuff would be too thin for this application.
Before drilling my helm I practiced on a scrap 2x6.
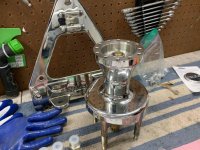
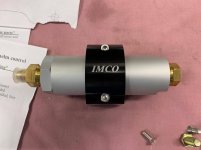
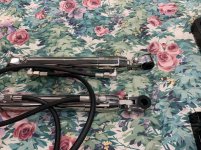
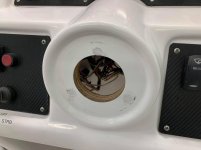
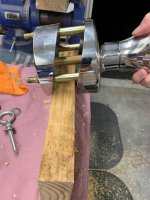


SabrToothSqrl
Well-known member
SabrToothSqrl
Well-known member
I'd love to think that's it, but then why not just put 15mm on the hole size? I HATE STANDARD. How is it a standard if only 2 countries use it?! Metric is in a million ways superior.
I moved the rear engine light and a house of the way for now.
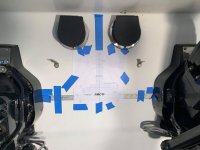
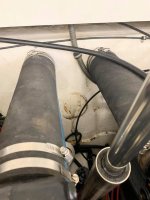
Well, I was hoping to get my friend to spot check my measurements with me, but he's apparently off-shore racing this week. so I guess I'll wait.
I'll check the measurements a few more times for fun. I plan to drill just the 2 holes for the hydro lines, then with the mount against the transom I'll know where the rest of the holes are for sure...
Using another video online for mounting steering, the center of the driveshaft should be the center of the trim sender, strait back level to the hull. I took a yard stick from walmart and cut it to the length between the assemblies. FYI, the tape is not center. the line ON the tape is center. Also, it's my understanding that taping the hull before you drill helps prevent gel coat chips.
I moved the rear engine light and a house of the way for now.


Well, I was hoping to get my friend to spot check my measurements with me, but he's apparently off-shore racing this week. so I guess I'll wait.
I'll check the measurements a few more times for fun. I plan to drill just the 2 holes for the hydro lines, then with the mount against the transom I'll know where the rest of the holes are for sure...
Using another video online for mounting steering, the center of the driveshaft should be the center of the trim sender, strait back level to the hull. I took a yard stick from walmart and cut it to the length between the assemblies. FYI, the tape is not center. the line ON the tape is center. Also, it's my understanding that taping the hull before you drill helps prevent gel coat chips.
Last edited:
SabrToothSqrl
Well-known member
IMCO states: 100% silicon to mount the uni-mount. I'm leaning more towards 3M 4200.
I plan to call them today.
3M Silicon says above waterline only.
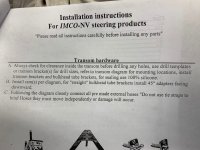
https://multimedia.3m.com/mws/media/1091954O/3mmarine-adhesive-sealant-solutions-for-boat-owners.pdf
I plan to call them today.
3M Silicon says above waterline only.

https://multimedia.3m.com/mws/media/1091954O/3mmarine-adhesive-sealant-solutions-for-boat-owners.pdf
Last edited:
SabrToothSqrl
Well-known member
I called, they stuck with the Silicone.
https://www.amazon.com/3M-08019-Mar...3301961&sprefix=3m+marine+sili,aps,217&sr=8-4
Amazon next day - man I love this stuff.
Hopefully the other parts I need to get the drives back on come tomorrow. ugh.
https://www.amazon.com/3M-08019-Mar...3301961&sprefix=3m+marine+sili,aps,217&sr=8-4
Amazon next day - man I love this stuff.
Hopefully the other parts I need to get the drives back on come tomorrow. ugh.
SabrToothSqrl
Well-known member
Silly cone is all I used to seal up my thru hull exhaust
I think I used 4200 on mine when I cooked one by forgetting to hook up water to the engine.
Of course, I assume your exhaust is above the water. something the 3M is rated for...
Last edited:
