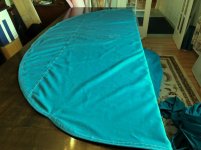
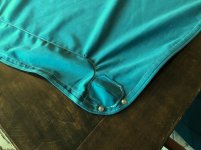
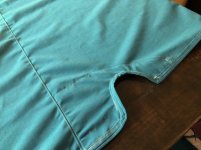
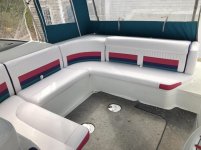
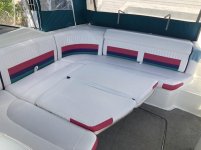
I have been busy over the winter so far. The 23 yo vinyl upholstery was getting brittle and starting to crack. Sooo, I decided to take on the re-upholstery as a DIY project. I got myself an industrial sewing machine designed for upholstery & leather, did some practicing on some spare vinyl and went about making new vinyl skins.
I changed up the design a little bit to give the boat a fresh look. I also contacted TAG to get the vinyl color names/codes. They no longer stocked the colors, but gave me the name of the place that they sold their old stock to. My boat is the 'Palm Beach' colors of the 1990's (pink/purple/light green).
I was able to get the original pink, matched the purple, but could not find the light green. So, I settled on a darker green.
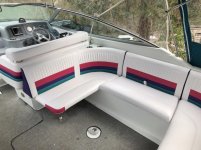
Here is the original color and design . . . (click thumbnails for larger view of pictures)
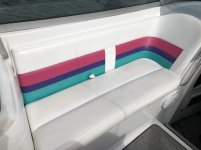
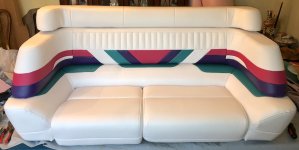
Here is the same seat backrest that I made new . . . I changed the ends to be 'banded' rather than wrap-around, went with a 'channel' vinyl in the top white section, and added a little bit of color on the sides.
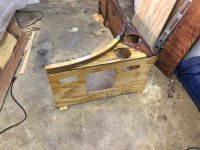
I did have to re-make some of the seat base boards and backrest framework. . .
This piece (below) was completely rotted in part of it . . . the lighter wood is the new section that I made.
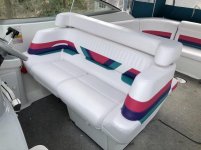
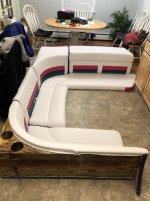
Here are some pictures of the new vinyl seats for the U-shape cockpit seating . . .
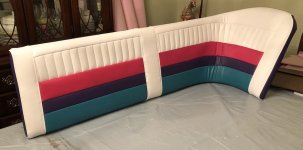
The new seat bases and backrest set up in my kitchen for looks.
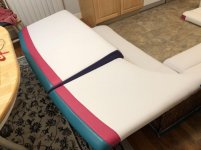
I added the pink/green striping to the sunpad, which previously was just plain white.
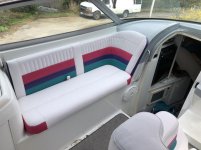
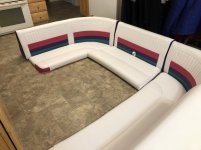
This is a view of the forward part of the U-shaped seating.
Here is the helm seat - re-designed . . .
I have finished the vinyl work (took about 3 months working nights & weekends). Next steps are to assemble all this stuff back into the boat. Right now I got all the stuff (13 pieces total) loaded into 2 cars ready to take them to the summer house (where the boat is located). I probably won't install them until April, when the weather warms up a bit. I'll post some updates then.
In making these new vinyl skins, I came to realize that the Formula upholstery is fairly complicated in its design. Lots of colors and shapes to deal with, which I found challenging at times.
I changed up the design a little bit to give the boat a fresh look. I also contacted TAG to get the vinyl color names/codes. They no longer stocked the colors, but gave me the name of the place that they sold their old stock to. My boat is the 'Palm Beach' colors of the 1990's (pink/purple/light green).
I was able to get the original pink, matched the purple, but could not find the light green. So, I settled on a darker green.
Here is the original color and design . . . (click thumbnails for larger view of pictures)

Here is the same seat backrest that I made new . . . I changed the ends to be 'banded' rather than wrap-around, went with a 'channel' vinyl in the top white section, and added a little bit of color on the sides.

I did have to re-make some of the seat base boards and backrest framework. . .
This piece (below) was completely rotted in part of it . . . the lighter wood is the new section that I made.

Here are some pictures of the new vinyl seats for the U-shape cockpit seating . . .
The new seat bases and backrest set up in my kitchen for looks.

I added the pink/green striping to the sunpad, which previously was just plain white.

This is a view of the forward part of the U-shaped seating.

Here is the helm seat - re-designed . . .

I have finished the vinyl work (took about 3 months working nights & weekends). Next steps are to assemble all this stuff back into the boat. Right now I got all the stuff (13 pieces total) loaded into 2 cars ready to take them to the summer house (where the boat is located). I probably won't install them until April, when the weather warms up a bit. I'll post some updates then.
In making these new vinyl skins, I came to realize that the Formula upholstery is fairly complicated in its design. Lots of colors and shapes to deal with, which I found challenging at times.
