Cummins 6CTA aftercooler service diy


FormulaONE

New member
Hello everyone. So the topic of my last post was a coolant leak that I discovered on top of the exhaust manifold. I ordered the appropriate gasket from SBmarine and went to the boat yesterday to install the gasket. Before I started the install my ocd kicked in and I decided to pull the bottom zincs on the Aftercoolers to let them drain the pink stuff I winterized with as we are experiencing very cold temps here in Philly. While they were draining I saw small chunks of black rubber coming out of both coolers. I put my pinky into the zinc hole and felt a lot of debris. So with a combination of the debris that I felt and the boat approaching 1000 hours I decided to remove both Aftercoolers and order the rebuild/service kit, for $180.00 for both engines.. no brainer right?

I brought the coolers back to my garage and was utterly surprised of the amount of impeller blades were in there!!. I spoke to the previous owner and he confirmed that the first owner experienced failures in both impellers and that he ( the previous owner ) tried to remove as much as he could. I’ve only had the boat since October so I ran it only a few times and she runs great and I know the previous owner personally and he has never had issues with over heating or anything.

It amazes me how robust these coolers are to have that much debris and not see a negative impact on performance. That debris has been in there since at least 2003!.

Anyone with a moderate amount of mechanical aptitude can do this and save a lot of money. On the same note, if it is intimidating to some than definitely leave it to a technician to do as these are critical engine components and if done incorrectly can destroy your engine.

Here are some pictures from disassembly yesterday.
e667f9c7561a80987c1fe3722634e074.jpg
45382bf720bf1362c35b5dd6dc7be4f3.jpg
1e16f2d7cae27c2260a0c3c3bafda781.jpg
0f5481841c7e0ba9775326c1222f8edb.jpg
f0a1dcbcd6993ae5e3e7c1b14428ea2a.jpg
6025de205b556778a09f8b2689812ce3.jpg
3097e0a558867d71e593f86945a0db5b.jpg
4f4264efbbbd29386ee8209cdf585cc5.jpg


Sent from my iPhone using Tapatalk

 
Are you having the intercoolers cleaned? I did the same thing on my Yanmars and brought them to a radiator shop and had them cleaned.
 
Wow, that does look like something that would affect the cooler performace. Job well done!

Thank you! I remember when the previous owner bought the boat back in 2003 and he has never done the Aftercooler service and the boat always ran great. According to him, the first owner experienced impeller failure on both engines. So these chunks have been in there since before 2003! Any improvement on performance would be awesome!. I am hoping that once the cores are clean that it will reduce the smokey start ups at least.


Sent from my iPhone using Tapatalk
 
Last edited:
Are you having the intercoolers cleaned? I did the same thing on my Yanmars and brought them to a radiator shop and had them cleaned.

I think that I will attempt to clean them with brake cleaner and then simple green first. If they are still dirty then I will take them to be cleaned.


Sent from my iPhone using Tapatalk
 
Great pictures. I am thinking of doing the same thing to mine this year. The last owner does not know when it was done last and I have had the boat three years.
 
Great pictures. I am thinking of doing the same thing to mine this year. The last owner does not know when it was done last and I have had the boat three years.

Thank you. I am trying to document everything that I’ve done to the boat myself to not only help others but also learn from others along the way. I will update with more pics once I get the parts and re-assemble the coolers. The BIG thing with this job is to pressure test once they are back together because if they leak it could destroy the engine. I will post pictures of how I will test them as well.

It only took me about 15 minutes on the starboard engine and 25-30 minutes on the port side to remove the coolers. So if you feel that it is within your ability, I say go for it! It was literally only 5 bolts and 4 hoses to remove each cooler. Although I am sure that re-installing the port side will be more challenging due to its location and having to align the bolt holes and putting the bottom raw water hose back on.

This will be my first full season with my PC and a diesel boat in general so I am trying to avoid any hiccups.

- Bob


Sent from my iPhone using Tapatalk
 
It was actually nice out today so I figured I’d take advantage and knock out one of these Aftercoolers outside. I got the Aftercooler maintenance kit from seaboard marine and also got a ton of advice from them as well. I cleaned out the fins on the core with brake clean and simple green and hosed out as much grime as possible and then hit it with compressed air.
9a4645b1f472e1a7003d6c8529eec6d2.jpg
c5ab3d21b778ffdd5a03f0225d842615.jpg
ceb2ab5d617a071ac8d5b409daec5754.jpg
8c297b270c737cd0eda44d08bfde892f.jpg


When assembling I learned that the key is to use plenty of lube to prevent corrosion inside the Aftercooler. The lube that I used was Alco metal lube and was supplied with the maintenance kit from sb marine.
faf9722442ebb331a91dae285c27e2a6.jpg
62cde6064efbbf877671afd3a2368f09.jpg


It was also recommended to use pipe dope to install the new zincs. Both the zincs and the pipe dope was also supplied with the kit. The only thing you need are basic hand tools.
10503c8661e89e2356973f2d4b373ad0.jpg


I set up a rig to pressure test but unfortunately the rig is leaking and I need to make a run back to Lowe’s to get a new piece of pvc. Once I have everything that I need, I will pressure test for a few hours to make sure that there are zero leaks and that the core was not damaged during disassembly or reassembly.
1a22c1762cef2a2c17b44bc838042372.jpg


Then once I confirm that there are no leaks I will repaint and reinstall on the boat. I will keep this post updated as I go along.

-Bob


Sent from my iPhone using Tapatalk
 
I had some time to knock out the Port Aftercooler today. After I confirm no leaks doing a pressure test I will repaint and reinstall and that is that. During the pressure test on the starboard cooler I noticed that the turbo pipe coupler that I never loosened from the cooler was leaking under pressure. This could only mean that there was also a boost leak. So I had a bunch of new 2.5” Mishimoto couplers from a car build years ago lying around so I will be replacing all 8 ( 4 on each engine).

d8828ba4a849adcd592ae04dcba88708.jpg
aa11a1bb743d67a3fe4ae7f42a0f629b.jpg
bf99ffbe428574273707cd8881571c61.jpg
ba65e2bda495ec08bc0057e40ee355ea.jpg
b98a3526a9ed6a57a695dd97f14f4535.jpg
73a68b376b2f6da517df162e65799493.jpg
446ded5d85da4dbc78b560907d642661.jpg
6914bf45ac330bff47a1cef34c1f11d2.jpg


- Bob


Sent from my iPhone using Tapatalk
 
Bob, very nice work on your aftercoolers. I just bought a 1999 41 PC and brought her home last weekend. I've been all over the SeaBoard Marine website regarding their aftercooler maintenance. I may give this a shot in the off season. I think my biggest concerns are removing and reinstalling the port aftercooler. How did that go for you? Also, creating a rig to pressure test the cooler. What components did you use to make yours?

Thanks

Sorry for the delayed response as I haven?t been on the forums too often.

Congratulations on your 41PC! They are amazing boats.

I used sbmar to learn the procedure of doing the aftercooler service and I can tell you that for what it cost to get it done, doing it yourself is the way to go. Just make sure that you follow Tony?s instructions and use plenty of lube.

The port side was a little challenging but I managed to remove and reinstall by myself. A couple of bruised ribs and a bruised bicep and a few choice words and it was done. As for the pressure test rig, I ended up using a pvc end cap clamped to the silicone coupler on the aftercooler and a pvc cap with a 3/8 threaded bung to install the gauge and valve clamped to the other side using the silicone coupler. I pressurized to 35psi and let it sit for 24 hours to monitor to ensure no leaks.

Whilst removing the coolers i noticed that my silicone couplers were in bad shape and appeared to be leaking boost. I bought 8 couplers from Mishimoto as I?ve used them on a high horsepower Supra that I built in the past and they can certainly handle the boost that these engines make. They are a lot cheaper than the oem Cummins ones too!

Shoot me a message and I?ll give you my number to help you out.

Good luck!!!!


Sent from my iPhone using Tapatalk
 
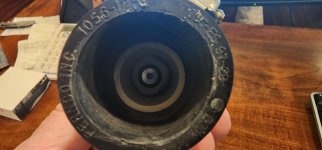
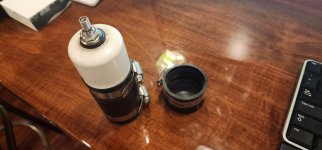
Old post, but worth an update. After being inspired by FormulaONE, I made a similar pressure testing device. Very simple, I also used a rubber cap on one end and made an adapter for the other that included a tire stem. I pressurized to 20 psi, and waited a week. The second reading was 17 psi, which I figured is close enough (allowance for temperature variation and tolerance on the digital tire gauge).

Thanks to FormulaONE for the inspiration!

20221111_120748.jpg20221111_120804.jpg
 
Back
Top