You are using an out of date browser. It may not display this or other websites correctly.
You should upgrade or use an alternative browser.
You should upgrade or use an alternative browser.
Winter Work
- Thread starter SabrToothSqrl
- Start date
SabrToothSqrl
Well-known member
Perfect seal seems to thin to make the 3/16" bead they describe. I'd think the RTV would be the better one...
Last edited:
AllDodge
Well-known member
I should back track and say that the black RTV is more resistive to oil so should be used over the Blue.
RTV is used on intake gaskets front and rear. Using to much is bad because the rtv can cause the gasket to slide off the edge
Perfect seal is used on threads, the bolts the are used to hold the intake

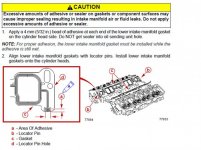
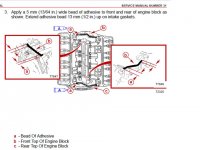
RTV is used on intake gaskets front and rear. Using to much is bad because the rtv can cause the gasket to slide off the edge
Perfect seal is used on threads, the bolts the are used to hold the intake


Last edited:
SabrToothSqrl
Well-known member
The manual I have makes no mention of using anything on the intake manifold gaskets... interesting...
It is from 1999. Is yours newer?
1. Apply a 3/16 in. (5 mm) wide bead of Quicksilver RTV Sealer to engine block as shown.
Extend sealer 1/2 in. (13 mm) up on intake gaskets.
2. Apply Loctite Pipe Thread Sealant to the threads of the four inner manifold bolts.
3. Carefully install manifold assembly and torque bolts to 18 lb-ft (24 Nm) in sequence as
shown.
Connect all electrical leads.
5. Connect hoses to thermostat housing.
6. Install fuel line.
SERVICE MANUAL NUMBER 24 5.0l / 305 cid / 5.7l / 350 cid ENGINES
90-861327--1 OCTOBER 1999 Page 3A-23
7. Connect crankcase ventilation hose(s).
8. Install distributor. Position rotor and housing to align with marks made during removal,
then install distributor cap.
9. Install other ignition components and reconnect wires.
10. Coat threads of oil pressure sending unit with Quicksilver Perfect Seal and install.
11. Connect any items that were disconnected.
12. Start engine.
13. Adjust ignition timing. Adjust carburetor, if equipped.
14. Check hose connections, gaskets and seals for leaks.
15. Inspect fuel line connections for fuel leaks.
Thanks! I definitely do not want intake leaks! I'm so anxious to just get started already, I have so many parts and things just stockpiled in my garage... But I also want to take my time do it right.
SabrToothSqrl
Well-known member
Thanks. Looks like I have #24. Just got #31 now.
#24 is 895 pages
#31 is 636 pages
Thanks! Good call on where to RTV.
#24 is 895 pages
#31 is 636 pages
Thanks! Good call on where to RTV.
Last edited:
SabrToothSqrl
Well-known member
Updates
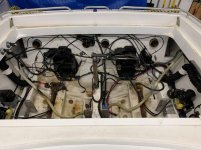
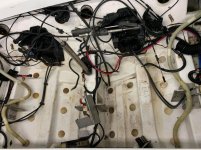
I did some stuff.
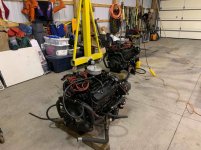
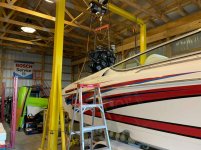
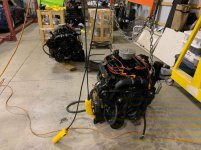
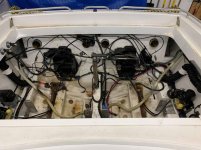
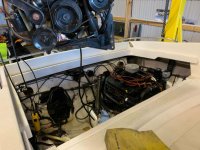
next comes more stuff.
Tonight I plan to start swapping stuff from port to new engine. I like to drop port in first as hoses have to travel under starboard.
Tuesday I plan to clean the bilge and get the bilge pump models to order new.
Man, what a cluster.
Ohh, AllDodge, Starboard has an Alpha drive coupler?! Port (which was replaced 2018) is a Bravo!
My drives are Bravo from Formula. I highly doubt Formula would have put in an Alpha coupler... I ordered a Bravo one to install on Starboard since the engine is already out and the existing one is 20 years old.
I'm going to assume the previous owner was an idiot and used an Alpha coupler because it's cheaper? thoughts?
I did some stuff.


next comes more stuff.
Tonight I plan to start swapping stuff from port to new engine. I like to drop port in first as hoses have to travel under starboard.
Tuesday I plan to clean the bilge and get the bilge pump models to order new.
Man, what a cluster.
Ohh, AllDodge, Starboard has an Alpha drive coupler?! Port (which was replaced 2018) is a Bravo!
My drives are Bravo from Formula. I highly doubt Formula would have put in an Alpha coupler... I ordered a Bravo one to install on Starboard since the engine is already out and the existing one is 20 years old.
I'm going to assume the previous owner was an idiot and used an Alpha coupler because it's cheaper? thoughts?
Last edited:
AllDodge
Well-known member
Your motors are during the year of change over somewhat. Assuming the Alpha coupler is the triangle type, and it was used on 4, 6 and 8 cylinder motors. The spline is the same on both Alpha and Bravo and can be used with either drive. The engine serial number could determine which was used during the build. Your motors doesn't produce enough power to strip the triangle out and should work fine. The newer coupler is used most often these days
SabrToothSqrl
Well-known member
I wonder if Starboard was this way too before they switched it. I figured if one went, might as well do the other since I have the engine out anyway... then I know both engines are new and both couplers are new.
Thanks
Thanks
SabrToothSqrl
Well-known member
afratki
Member
I did some stuff.
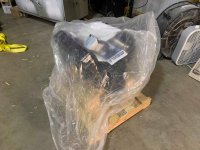
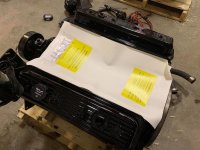
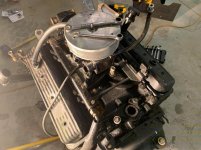
View attachment 9972View attachment 9971View attachment 9973View attachment 9974View attachment 9975
next comes more stuff.
Tonight I plan to start swapping stuff from port to new engine. I like to drop port in first as hoses have to travel under starboard.
Tuesday I plan to clean the bilge and get the bilge pump models to order new.
Man, what a cluster.
Ohh, AllDodge, Starboard has an Alpha drive coupler?! Port (which was replaced 2018) is a Bravo!
My drives are Bravo from Formula. I highly doubt Formula would have put in an Alpha coupler... I ordered a Bravo one to install on Starboard since the engine is already out and the existing one is 20 years old.
I'm going to assume the previous owner was an idiot and used an Alpha coupler because it's cheaper? thoughts?
Nice setup you have there, sure makes the job easier
SabrToothSqrl
Well-known member
Thanks. This is actually a friends garage. I needed his homemade crane as anything off the shelf is never big enough... he uses it to work on his race boat lol.
SabrToothSqrl
Well-known member
SabrToothSqrl
Well-known member
Port Engine Stripped
I'm debating keeping my old rocker covers, the holes are in different areas. I don't think it would make a difference, but I kind of like the old ones more. I'll remove them and paint them if I decide to install them on the new engine.
I got port stripped. the valley seems to have a lot of water in the oil. This was the 'running' engine. But it did fail compression on 2/8 and I broke the sparkplug in one. So I pulled it since I was doing STRB anyway.
Tonight I'll clean up the bolts before reusing in the new. I like to run them under a wire wheel to make sure no gunk gets in the new engine holes. I'll most likely paint the engine brace as well...
I noticed the intake manifold doesn't even use the rear 2 water passages... seems like a waste.
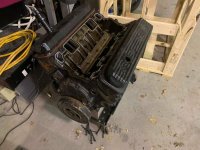
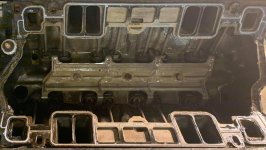
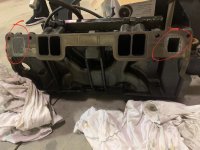


AllDodge
Well-known member
In most cases (not all) you need the holes in the same place so oil can be added. Other things may be in the way like shift plate, remote oil filter, other.
Water in oil comes in most cases from a head gasket, but can also come from the intake (gasket or crack). Use a straight edge on the intake flange and see if it needs to be shaved or built up.
Water in oil comes in most cases from a head gasket, but can also come from the intake (gasket or crack). Use a straight edge on the intake flange and see if it needs to be shaved or built up.
SabrToothSqrl
Well-known member
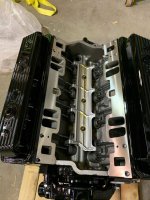
Good call. I guess I'll be removing and painting them. ugh. why do they include the 'wrong' ones then? The intake manifold seems to be in really good shape. Thing is so heavy. Cast Iron I'm guessing. How much should I scrape it clean? I'd like to wire wheel it, but don't want to get anything inside it by accident... I used brake cleaner and a rag on it to get the sealing surfaces as clean as possible. (pic was before cleaning).
Timing: I noticed the new engine has a mark on the block for TDC, and the harmonic balancer has a notch for Zero... but there are no degree marks.
How would I then set the base timing to the EFI 8 degrees before TDC that the manual says to?
thanks!
Timing: I noticed the new engine has a mark on the block for TDC, and the harmonic balancer has a notch for Zero... but there are no degree marks.
How would I then set the base timing to the EFI 8 degrees before TDC that the manual says to?
thanks!
Last edited:
AllDodge
Well-known member
Using a wire wheel won't hurt the cast iron, and I would clean it up, then use a water hose and compressed air dry. Good old soap and water cleans it right up. Everything that is not clean metal on gasket surfaces needs to be clean
Timing will need to be done with an advance timing light. Adjust the timing light to 8 BTDC then point the light at the mark and rotate dizzy accordingly. Could probably rent one at the local auto parts store
https://www.summitracing.com/search/part-type/timing-lights
Another method is install timing tape on the balancer, then you can use a regular light
https://www.summitracing.com/search...=Ascending&keyword=timing tape&kr=timing tape
SabrToothSqrl
Well-known member
Thank you! I didn't know timing lights could be adjusted like that.
AllDodge
Well-known member
Thank you! I didn't know timing lights could be adjusted like that.
Only the ones listed as "advance"
SabrToothSqrl
Well-known member
So I (think) I understand that a standard light flashes when the spark fires, and as it's running you rotate the distributor so that when it flashes (and you can see it) the TDC mark on the engine lines up with the 8 mark on the harmonic balancer. (which I'm guessing is 8"?) I'll measure tonight.
The advance one, I could 'set' to -8 degrees and it would flash before the spark plug fires? I'm checking youtube now as well, trying to figure out how these things work.
I have a mobile merc. guy buy he's kind of unrelaible. I want him to check my work, fire these up, and set the timine for me before I put them back in the hull.
The way my boat is, I cannot attach the exhaust elbows until it's in the hull. (the 4" pipes going back just won't bend that way, you attach the pipes then drop the elbow on the manifold).
But, I do want to bench test it before putting in the hull. I don't want water from the exhaust manifold going into my brand new engine. SO, is there any reason I cannot run the engine briefly without the exhaust manifold outside the hull?
I get that it will be loud and water will just dump from the thermostat housing houses to the ground... but no water should enter the engine areas. and with no manifold there is no need to cool said non-attached manifold...
thanks! I'm making progress. last night I cleaned up about 30 bolts and washers on my bench wire wheel. Then painted the old rocker covers and engine racing brace. Tonight I plan to get parts back onto the new port engine.
