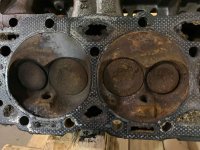
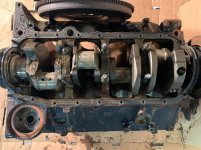
Winter Work


Without getting real deep into electronics, think of it like a timer. When the timing light is adjusted to -8 BTDC and the plug fires, circuity in the TL delays the flash by that many degrees before it flashes. Its actually done in milliseconds (ms), similar to dimmers for LED's.

A LED cannot be actually be dimmed, it can only be turned OFF or ON. To the eye it appears to be dimming because of the time the light is being turned OFF to being turned ON. The longer the OFF period the dimmer the light appears

The spark passes down the wire and is picked up by a timer which is an adjusted delay of lets say 5 ms. In those 5 ms the balancer is still turning, so when times up it flashes at the notch and groove.

As before, if you pick up some timing tape then there is no need for an advace TL, regular one works just fine

And no issue running without mans, just watch the plug wires so they don't get burned from the exhaust
 
OK, so how it works is how I thought it would. It's adjusting the flash based on the time from the plug firing. It's not real time. So the plug fires and the engine is spinning, and the lines should visually line up because the timing gun is adjusting for the degrees. Which it can do because it knows how often the spark occurs so it can determine engine RPM, which allows it to determine time between sparks and thus degrees between time... or so the legend goes.

But, all I have to do is set the scan tool to timing mode (holds 1200 RPM I think) then set the timing gun to 8, and then adjust the distributor until the flashing shows the line on the block and line on the balancer match up?

just checking. thanks!

Thanks again!


the garage I'm working out of, is not heated... I want to RTV the intake manifold but am concerned about it drying in the cold. It will most likely be days if not weeks until I get to fire these up. Should I move them somewhere warmer, or no worries w/the cold?

Sorry for so many stupid questions. It's hard to afford both boat and repairs. Plus I like to learn.
 
RTV will not dry at or below freezing. Even at 40 degrees it can take some time. Suggest using a heat lamp or similar to help

Your correct with the TL

Should even show the same on your scanner
 
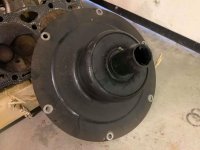
Thanks. I might just wait to do the RTV for Monday says 60 out I also have some shop lights and a space heater I can point at it. So then I'll do the brace, fuel cooler, filter, oil lines, accessories, raw water pump, belt, drive coupler, flywheel cover, starter tonight, then get a cheese steak! lol. easy peasy.
 
Last edited:
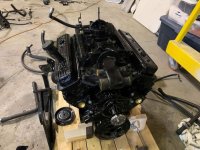
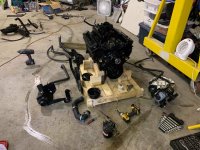
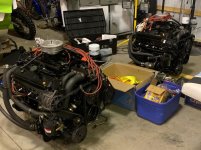
Port

Starting on starboard.
I'd be a lot farther, but managed to snap two bolt heads off..
when they painted the new engines they didn't cover the holes and the bolt wasn't going in. I thought the battery in the impact was low. new battery and manage to snap the heads off. good times.
Now I have to drill out 2. maybe an ez out will work (lol) and tap them to remove any crud.

ugh!

76199270_511630669688279_507821123304423424_n.jpg74463904_419646358685461_7561689017264111616_n.jpg

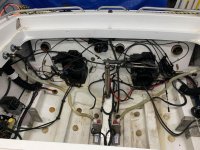
I got the old bilge pumps and switches out. new are in the car hope to assemble Wednesday.
 
Impact makes it faster but has the down side as you found out and also could cause bolts to snap, can also happen later from to much torque. Great for disassembly not so much for assembly IMO
 
Impact makes it faster but has the down side as you found out and also could cause bolts to snap, can also happen later from to much torque. Great for disassembly not so much for assembly IMO


Completely agree, my 1/4" DeWalt driver works great for most of it, installs to a good enough torque without breaking things. but it couldn't hack disassembly of some of the parts. so the 1/2" Snap On was on call... and that thing is a beast! That's what broke the bolts. I was pissed... I go through the effort of using a wire wheel to clean up all the bolts just to have the fact that it's painted in the bolt hole mess it up... I'm sure 20 year old rusted bolts didn't help. New ones ordered.

live and learn I guess. next time I'll run a tap into the hole if the bolt has too much resistance...

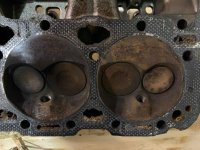
I'll strip the starboard engine sometime soon and see how bad that is... thats the one that had milkshake oil.
 
Got the oil adapter on Port last night, and oil lines installed. Waiting on Fuel lines for port. Should be able to try the 'pre lube' adapter so I can run the oil pump w/my cordless drill. Which way do I spin it? I assume clockwise.

Should I remove a rocker cover to see if oil is indeed flowing?

I removed the racing brace from Starboard so I could get to the 2 Fracked up bolts. I followed Eric the car guy's youtube on how to drill out a bolt, and thought I was doing well until I snapped 2 drill bits.

Ohh so luckily there was about 1/4" of the bolt sticking out of one, and a good 1/2" on the other...

So, i grabbed a cut off wheel/grinder and made the round bolt a 2 sided head. Used a large adjustable wrench and BAM got one out easy, and the other with some grunting. It was made really fun as the engine was on a hoist so I could get the bolts about chest level, so every movement I did the whole engine would swing.

New bolts/studs come tonight, fuel lines come friday I think, and I ordered the wrong oil filter adapter end for starboard, so I had to order the correct one.

I'm actually thinking that I could be 'done' by Thanksgiving... I do need something to do black Friday. Maybe it will be putting the engines back IN the boat...

Learned:

Always run a tap into the holes as the paint will mess you up! The tap goes in smooth, but comes out black from the paint. You can tell it's not making new threads, its just cleaning out the paint.

So, I plan to run a tap in all the exhaust manifold holes just in case. I don't want any more hassles, and that should only take a few minutes.

There are TWO 'holes' where the oil pressure sender could fit. One is correct and just above the oil filter adapter. the other is a hole into where a transmission/clutch would go and your gauge would always read zero if you put it there. Don't ask me how I know :)

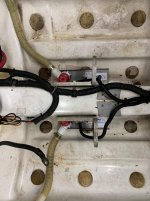
Also got my new bilge pumps and switches mounted. Hope to install in the hull and wire tonight.
 
Last edited:
Spin it clockwise

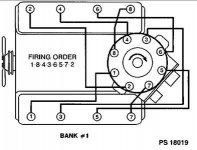
No need to remove valve cover unless you just want to see. Place a pressure gauge on the port, and also need to put oil pressure switch in oil port below the distributor

V8 firing order.jpg
 
Last edited:
Thanks! yep pressure switches installed. Correct I just wanted a way to see oil flowing. Rather find out now vs when they are in the hull.
 
Bilge Pumps In

Got Pump? New switches and new pumps.
I plan to clean the bilge one more time before the engines go in as well.

74463904_419646358685461_7561689017264111616_n.jpg76199270_511630669688279_507821123304423424_n.jpg
 
If you want it to look real good, get some epoxy paint, but that's a lot of work for visual appearance only
 
While cleaning out threads that are painted is necessary, you should learn to get a feel for when something isn't right with bolts. It may have been cross threaded instead of paint. First step is always see how much effort something is by hand while re-assembling. Impacts are great for loosely assembling things, spin until bottomed, then use hand tools/torque wrench depending on the bolt. If it doesn't spin free, then go to hand tools, and then ask yourself why this bolt is taking so much force to go in. No matter what, always toque critical bolts by hand, do not trust the impact to have enough power, and really there are only a few bolts that are not flange/mating surface bolts on an engine that you should be using the impact for final tightness anyway.

If it's a flange, or manifold, or anything with a bolt pattern, then impact is solely to save time running the bolt in to not even snug, never to do the tightening. Unless you do this all the time, I recommend leaving the impact driver for disassembly only. It really is an acquired skill that takes experience/practice.
 
Thanks, and you are completely correct.

It was late at night, I was tired, and literally 3 bolts from being done for the night, so when it didn't go in all the way, I grabbed a bigger 'tool' :) I knew it wasn't cross threaded, but thought the battery was dying, not that the resistance was increasing... as the bolts on the opposite side went in without issue. I kinda knew it was the wrong move then, and now even more so... but who knows I'm sure in some universe the bolt just went in and was solidly in place for the next 20 years lol.

For all critical parts I use the manual and torque to spec and in order. But for most of the bolts that just hold say the alternator brackets or power steering brackets, I've got a good hand and impact feel. But worked a 9 hour day + 3 hours in the shop in the freezing cold... as my buddy's shop is not heated. I just wanted the damn thing done.

Why I didn't just build my own gantry and do all this in my heated shop that's in my yard... I don't know.. I'm guessing I saved $400 not building the crane... plus his has an electric hoist and electric side to side lol...

He's dropping the engine back in the race boat tomorrow I think. I'll try to snap some pics for you guys.
 
More Stuff

Did some stuff. So close. Just waiting on an oil adapter and new fuel lines for Starboard now.


How 'long' should I run the oil pump for to prime it? How long after can they sit before I start them? So I can set the distributor and such...

thanks!
75407724_820827135018866_3474919118476410880_n.jpg75429415_731609030677756_1481487142700974080_n.jpg75446758_435094777202249_1149872318344855552_n.jpg77187087_992160377790355_7849855969633763328_n.jpg78172063_2519950881453849_259378022807764992_n.jpg

What kind of drive coupler is that? It looks like a Bravo with an extra shaft... It's not the triangle that the Alpha is.

I admit, I had a few nights of what the hell am I doing, omg this is so much work... but I honestly feel like I'm on the home stretch. I'm going to research bench testing, and hoping to get my Merc Mechanic to give them a once over, and set the timing. Then get these bad boys in the hull! I wonder how many years I was not running on 16 cylinders...
 
Last edited:
Back
Top