
You are using an out of date browser. It may not display this or other websites correctly.
You should upgrade or use an alternative browser.
You should upgrade or use an alternative browser.
It Dont Come Easy - Formula 26PC
- Thread starter I.D.C.E.
- Start date
sprink49
New member
Re: It Dont Come Easy [2012] Formula 26PC
WOW!!! the 26PC has always been one of my favorites and I understand why you are doing this restoration. I am into a similar ordeal with my '79 255 Liberator. the biggest difference I see is I am re-powering a twin engine set up and upgrading from No1 pre Alpha drives to Bravo I's. Twins double your effort but also double your fun.
I see some things I want to use in my project that you have used in yours...thanks for sharing.
You should create a blog for this project!!
I.D.C.E.
Administrator
Re: It Dont Come Easy [2012] Formula 26PC
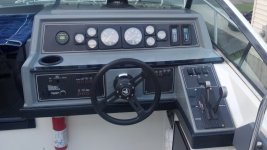
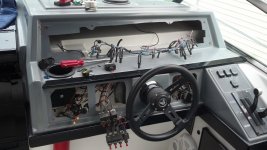
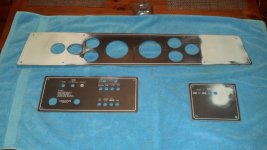
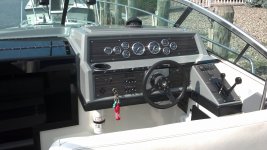
Might as well update It Dont Come Easy's Bio on here since the gauges and dash have been updated.
All panels were removed and holes were filled that were not relevant anymore, new Faria Chesapeake Black SS gauges were installed, custom blue led tip toggle switches that I tinted each tip because of being too bright, all custom lettering for the dash panels. Removed shifter assembly and reconditioned with a fresh coat of black.
Attachments
I.D.C.E.
Administrator
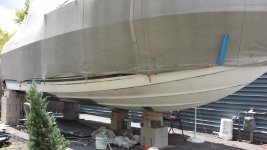
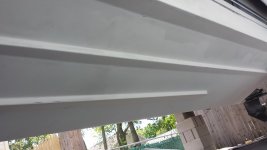
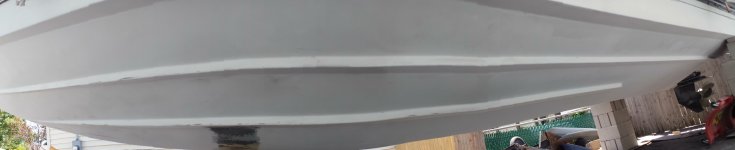
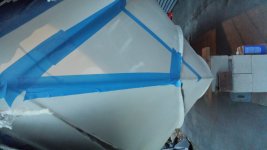
Of course I am back at it again and running a little behind but IDCE is going to show her bare bottom from now on. I stripped, scraped, sanded, sanded some more, gelcoat touchup in areas, have to sand some more then finally polish.... Since I havent kept the boat in the water more than a week at the time since the rebuild was done it was time to ditch the micron csc!
Remind me no more projects of this magnitude again!! Unless of course if someone would like to sponsor a Illmor setup")
Remind me no more projects of this magnitude again!! Unless of course if someone would like to sponsor a Illmor setup
Attachments
I.D.C.E.
Administrator
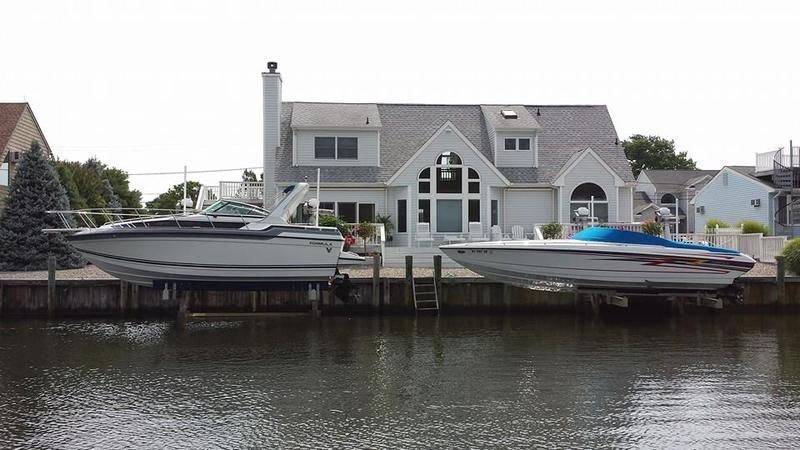
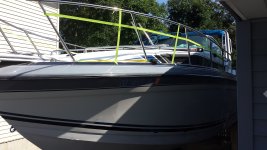
To follow up on my long de-bottom painting process.... here are some pics of it completed in the water showing off the side project while I was stripping the bottom I also installed the "45 yacht style" railing lighting.


Living 2 blocks from the water is a tease because I still have to bum bulkhead space from my Pops. He allowed me to install a lift this year so cant beat that.
Living 2 blocks from the water is a tease because I still have to bum bulkhead space from my Pops. He allowed me to install a lift this year so cant beat that.
Last edited:
I.D.C.E.
Administrator
Thanks, yeah it is not an easy task and takes a ridiculous amount of time.
Here's a nice run from this weekend.
http://youtu.be/FrIJSwWeHCw
Here's a nice run from this weekend.
http://youtu.be/FrIJSwWeHCw
Formula Tenn
New member
can you share your yacht rail lighting install? that looks really cool.
I.D.C.E.
Administrator
Formula Tenn said:can you share your yacht rail lighting install? that looks really cool.
It was a fun project that everyone should try once! :-*
Lol it was a pain but final results are all that matters after a project is all done. I pulled the front railing piece off to help give access to snake the wires throughout. On the 26s there are 4 rivets I drilled and also unbolted the railing from pulpit and it came off. I measured where i wanted the leds and laid out all the angles using making tape and drilled. I snaked the wires and pulled through each hole. I soldered each led light in line and waaalaah.


Attachments
I.D.C.E.,
The LED's in the railing are awesome. When time allows, would you mind providing more details on this mod?
1. Where did you feed into the railing? (Guessing you came through the deck at last stanchion aft, on Stbd side, closest to helm and switch?)
2. Can you share what LED and from where?
3. How did you secure the LED in the holes you drilled in railing?
I really like how you laid out the position to shine in between each stanchion base and toward the cabin edge to light up the side decks. Very well thought out. I will likely run on dedicated switch to allow for turning them off while running at night.
The LED's in the railing are awesome. When time allows, would you mind providing more details on this mod?
1. Where did you feed into the railing? (Guessing you came through the deck at last stanchion aft, on Stbd side, closest to helm and switch?)
2. Can you share what LED and from where?
3. How did you secure the LED in the holes you drilled in railing?
I really like how you laid out the position to shine in between each stanchion base and toward the cabin edge to light up the side decks. Very well thought out.
I will likely run on dedicated switch to allow for turning them off while running at night.I.D.C.E.
Administrator
Sure, helm side last railing drilled hole and sealed it. LED is from superbrightleds.com and they are push in style although you need to secure them with epoxy. Its a lot of figuring out and unfortunately you have one shot to drill or else that railings going to look like heck.
I.D.C.E.
Administrator
Pics from the latest trip to Florida with IDCE. IDCE was in good company as SplitDecision dragged Smoke down also! Something about that area it looks like the boat just belongs there!


One of my favorite shots of the time down there.... This pic makes getting rid of that bottom paint so worth it.


One of my favorite shots of the time down there.... This pic makes getting rid of that bottom paint so worth it.
Last edited:
I.D.C.E.
Administrator


On trailer ready to head back home... booo.

If you want to see the full FOONJ album of our Florida Snow Bird Trip check here...
https://www.facebook.com/media/set/...0.1073741836.172474352569&type=1&l=53c4e3923c
Last edited: